Quickstart
Connect KnotCMS once, map your fields, and sync Notion rows into a Framer CMS collection.
The setup wizard has three steps — always in this order: Framer → Notion → Mapping.
What you’ll need
Section titled “What you’ll need”- A Framer site with CMS access
- A Notion database with the content you want to sync
- A Google account (for KnotCMS sign-in)
- About 5 minutes
1. Sign in to KnotCMS
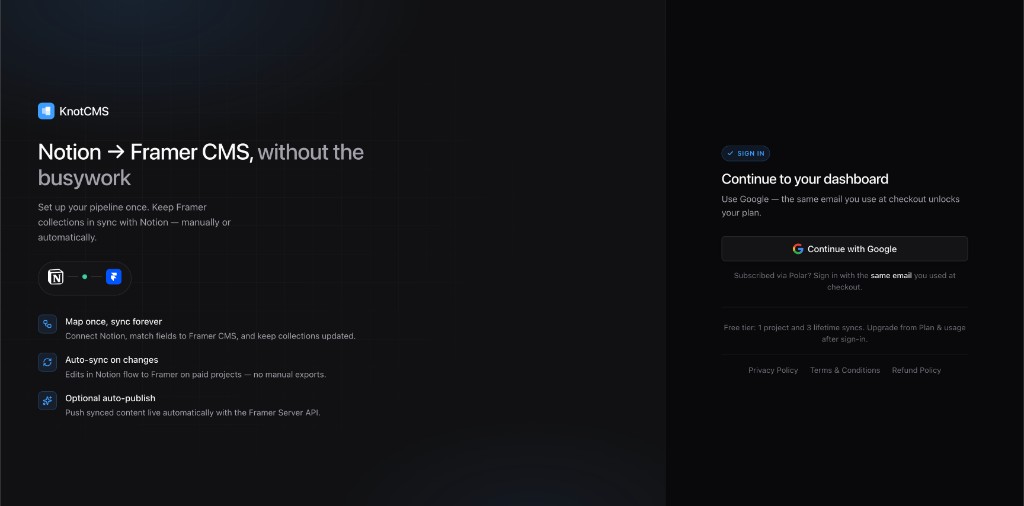
Section titled “1. Sign in to KnotCMS”Open app.knotcms.com and click Continue with Google.
2. Start a new project
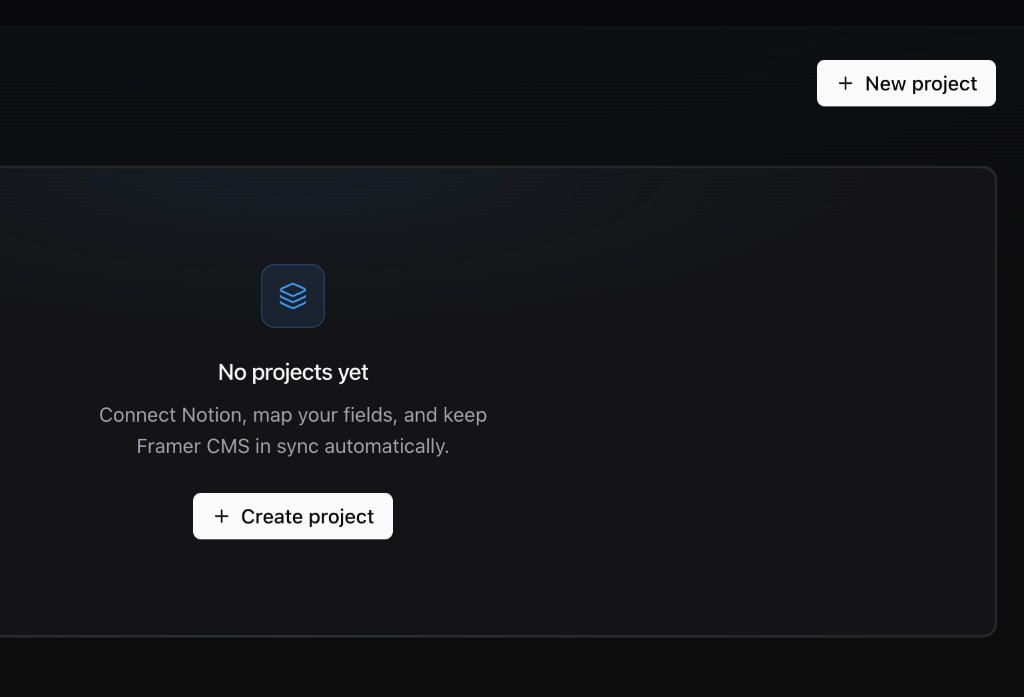
Section titled “2. Start a new project”From the dashboard, click + Create project (empty state) or + New project (top right). This opens the setup wizard.
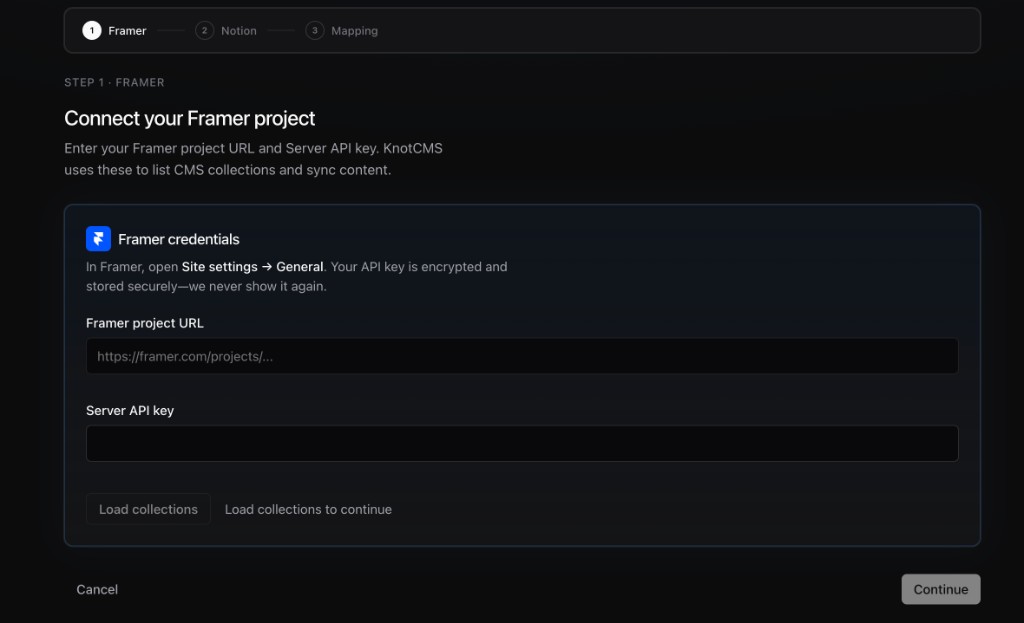
3. Connect Framer (wizard step 1)
Section titled “3. Connect Framer (wizard step 1)”On Step 1 · Framer:
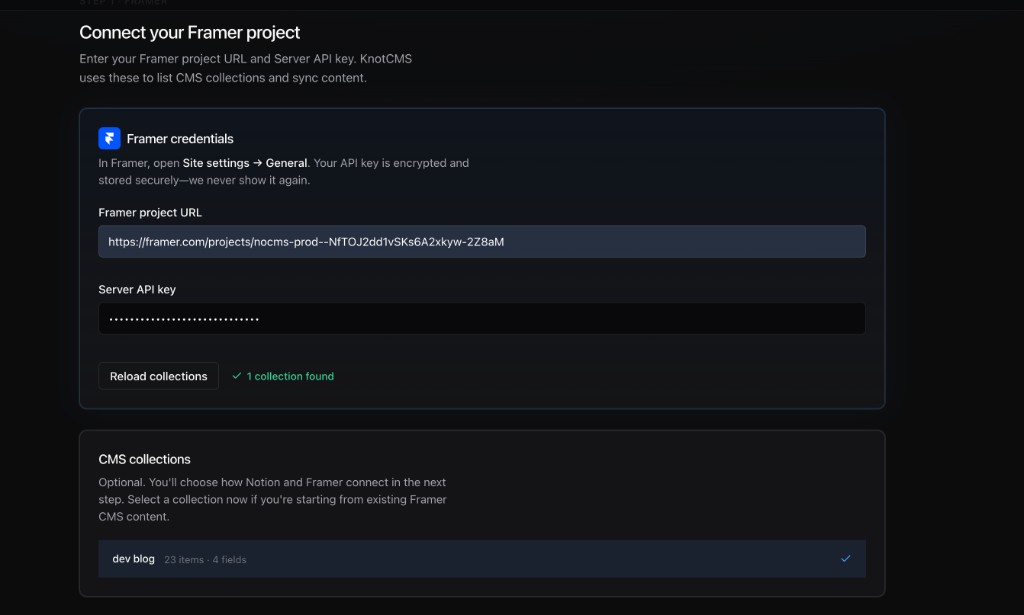
- Paste your Framer project URL and Server API key (from Framer → Site settings → General).
- Click Load collections.
- CMS collections (optional) — see below, then click Continue.
After collections load, KnotCMS shows an optional CMS collections list. You choose whether to pick one here based on how you will connect Notion in step 2:
| Step 2 option | Select a Framer collection in step 1? |
|---|---|
| Option 3 — new Framer collection from Notion (quickstart) | No — leave unselected and continue |
| Option 2 — connect existing databases | Yes — select the Framer CMS collection to sync into |
| Option 1 — bootstrap Notion from Framer CMS | Yes — select the Framer collection to import from |
The wizard copy says this is optional because the exact link happens in step 2 — but paths that start from existing Framer content require a selection here.
4. Connect Notion (wizard step 2)
Section titled “4. Connect Notion (wizard step 2)”On Step 2 · Notion:
Choose a setup path
Section titled “Choose a setup path”Under What do you want to do?, pick how Framer and Notion should link. The wizard lists three options in this order:
| # | Option in the wizard | When to use | Framer step 1 |
|---|---|---|---|
| 1 | Create new Notion database using an existing Framer CMS collection | Content lives in Framer CMS first — bootstrap into Notion | Select a Framer collection |
| 2 | Connect existing databases | You already have both a Notion database and a Framer CMS collection | Select a Framer collection |
| 3 | Create a new Framer CMS collection and sync with existing Notion database | You write in Notion — KnotCMS creates a synced Framer collection | No selection needed |
For this quickstart, choose option 3, connect Notion, then pick your database from the list.
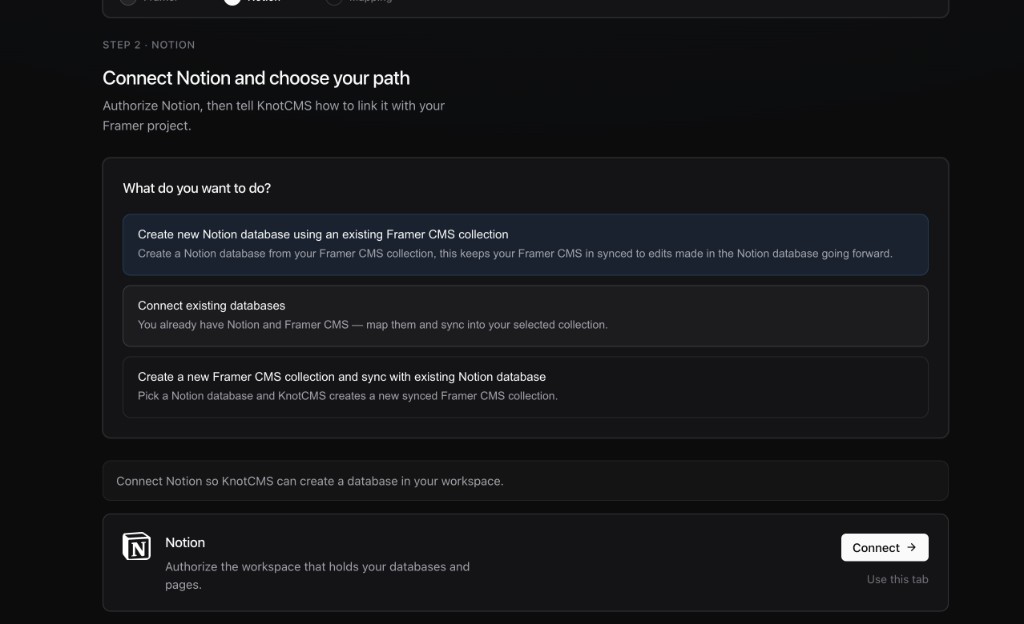
Authorize Notion
Section titled “Authorize Notion”- Click Connect on the Notion card (or Use this tab if the popup is blocked).
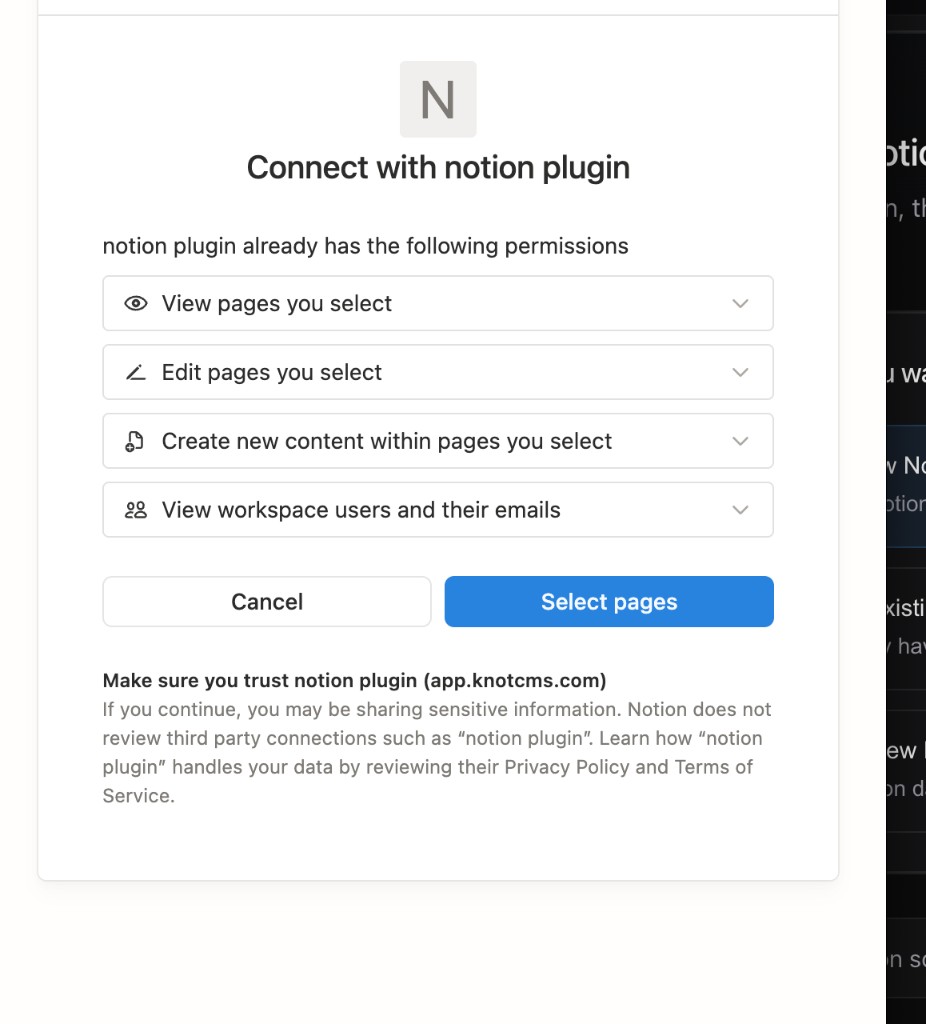
- In Notion’s Connect with notion plugin screen, click Select pages.
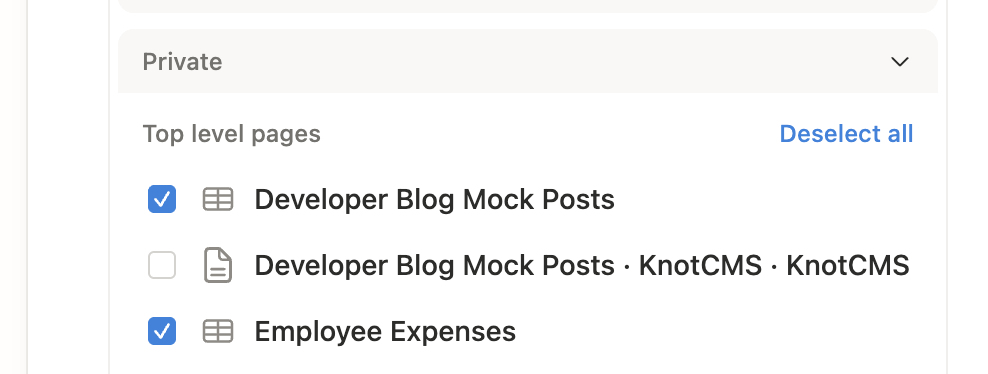
- Under Top level pages, check the database you want KnotCMS to sync (table icon — not a standalone page).
- Click Allow access.

What you’ll see after Notion is connected
Section titled “What you’ll see after Notion is connected”After OAuth, KnotCMS shows a different screen for each path:
Option 1 — Create Notion database from Framer — set Rows to import from Framer, then click Create Notion database. Use 0 to create an empty database, or Select all to import published rows.

If you import some but not all rows, KnotCMS shows a warning — skipped Framer rows stay in your collection but won’t sync from Notion until you add matching pages there.
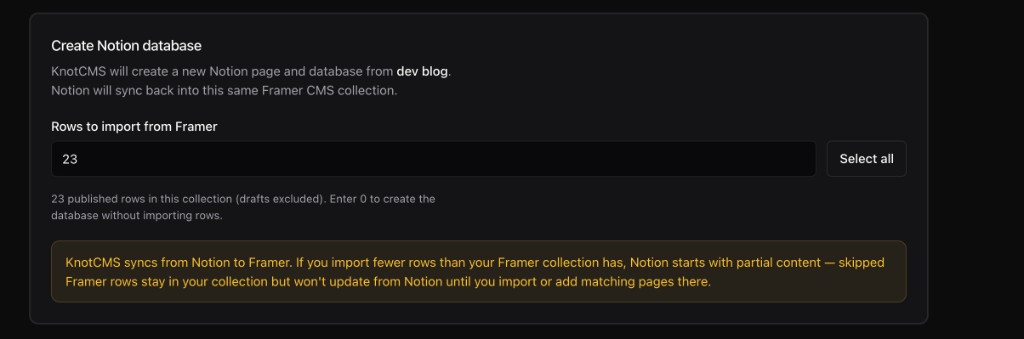
After Create Notion database, KnotCMS creates a new database in your Notion workspace (nested under a page named after your Framer collection). Open it in Notion to confirm the schema and imported rows.
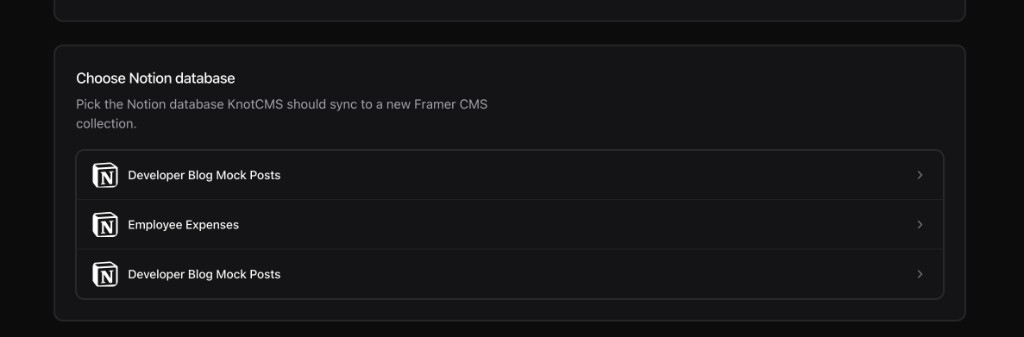
Option 2 — Connect existing databases — pick your Notion database from Choose Notion database. KnotCMS maps it to the Framer collection you selected in step 1.
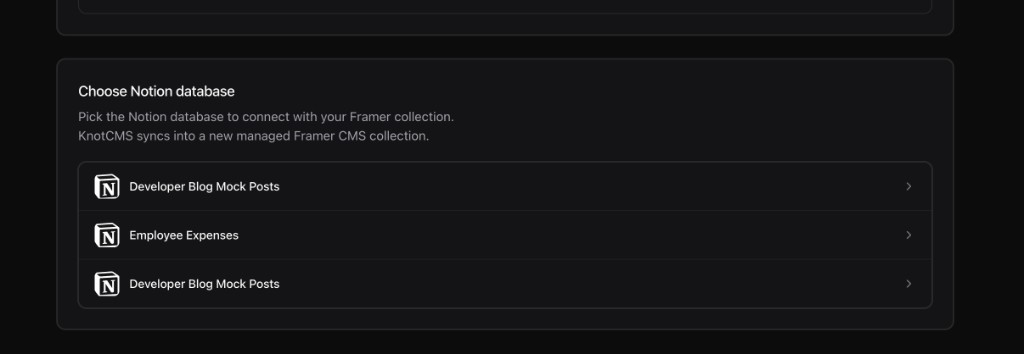
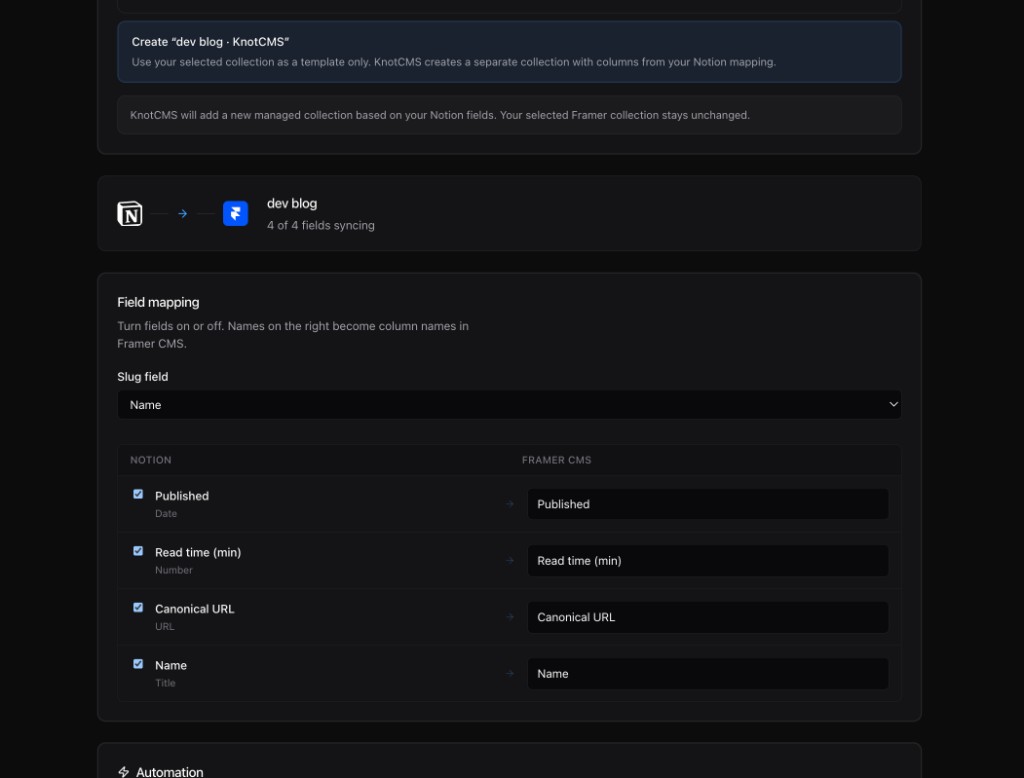
Option 3 — New Framer collection from Notion (quickstart) — pick your Notion database from Choose Notion database. KnotCMS will create a new managed Framer CMS collection in the mapping step.
5. Map fields and sync (wizard step 3)
Section titled “5. Map fields and sync (wizard step 3)”On Step 3 · Mapping, what you see depends on your setup path:
Option 3 — New Framer collection (quickstart)
Section titled “Option 3 — New Framer collection (quickstart)”Map Notion fields, pick the slug, then Create & sync. KnotCMS creates a new managed Framer collection — there is no Where should Notion sync? section.

Option 2 — Connect existing
Section titled “Option 2 — Connect existing”If you chose Connect existing databases and selected a Framer collection in step 1, mapping starts with Where should Notion sync?:
First option — Update existing collection (in-place)
Sync into the Framer CMS collection you already use. Column names must match the fields you map.
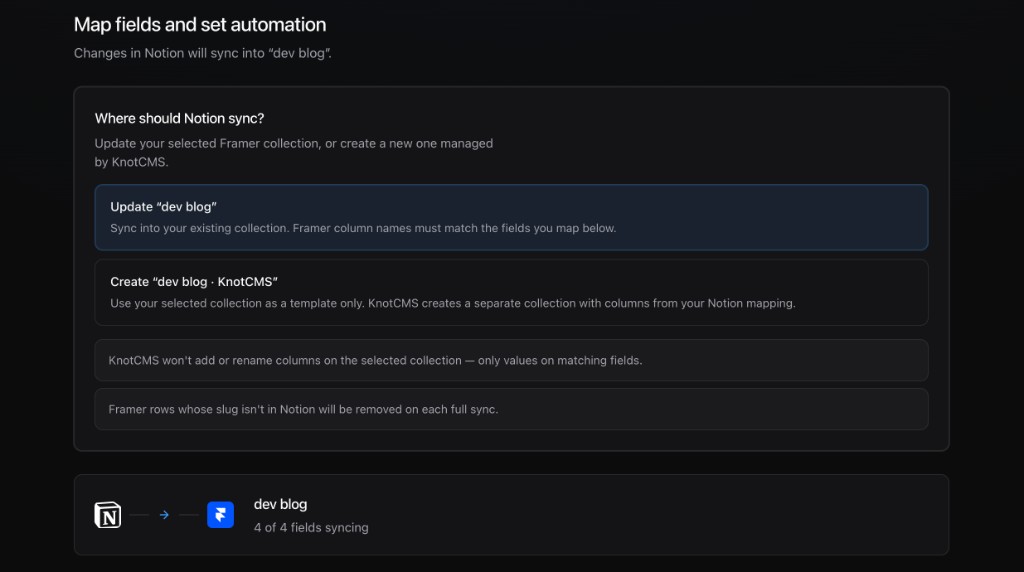
Second option — Create new KnotCMS collection
Uses your selected collection as a template only. KnotCMS creates a separate ”… · KnotCMS” collection with columns from your Notion mapping. Your original Framer collection stays unchanged.
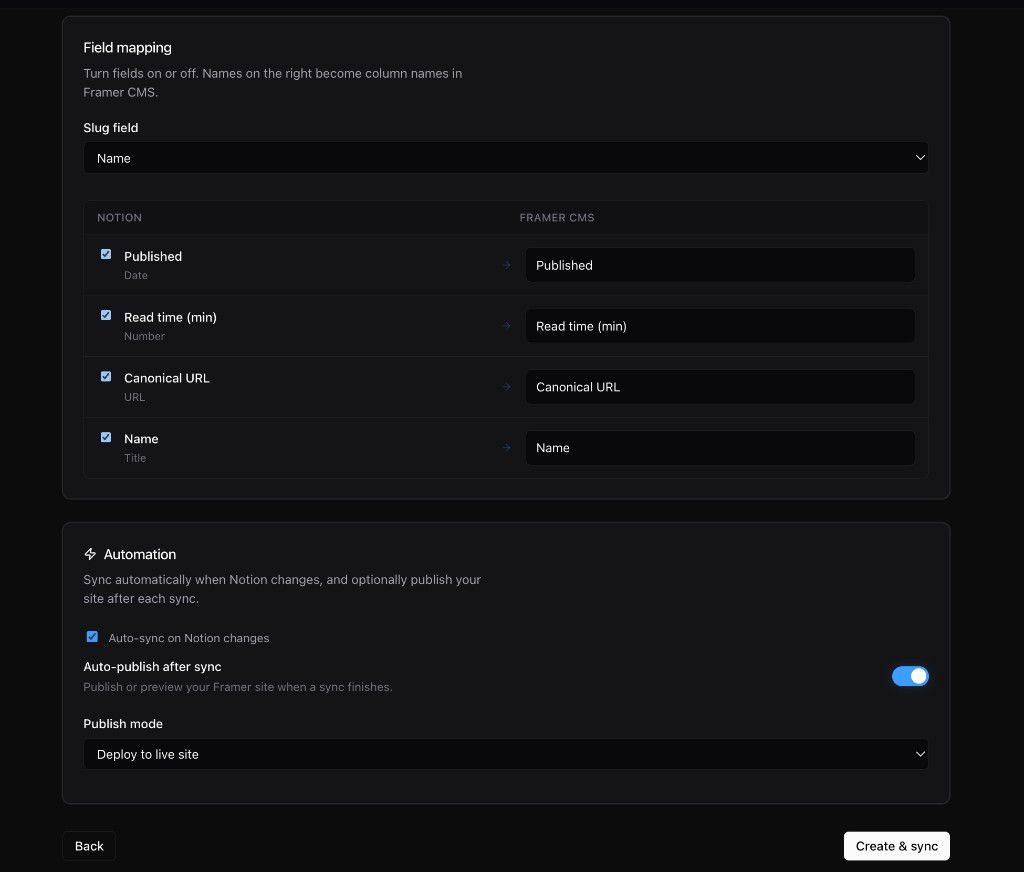
Then map fields, pick the slug, review Automation, and click Create & sync:
All paths
Section titled “All paths”- Turn on the Notion properties you want in Framer.
- Choose which property is the slug.
- Leave Auto-sync off on the Basic plan (it is gated anyway). If you are on a paid plan and turn it on, finish step 7 after setup — otherwise the project page shows a webhook warning even though your first sync succeeded.
- Click Create & sync — this creates the project and runs your first sync (uses one Basic-plan sync).
6. Confirm your first sync
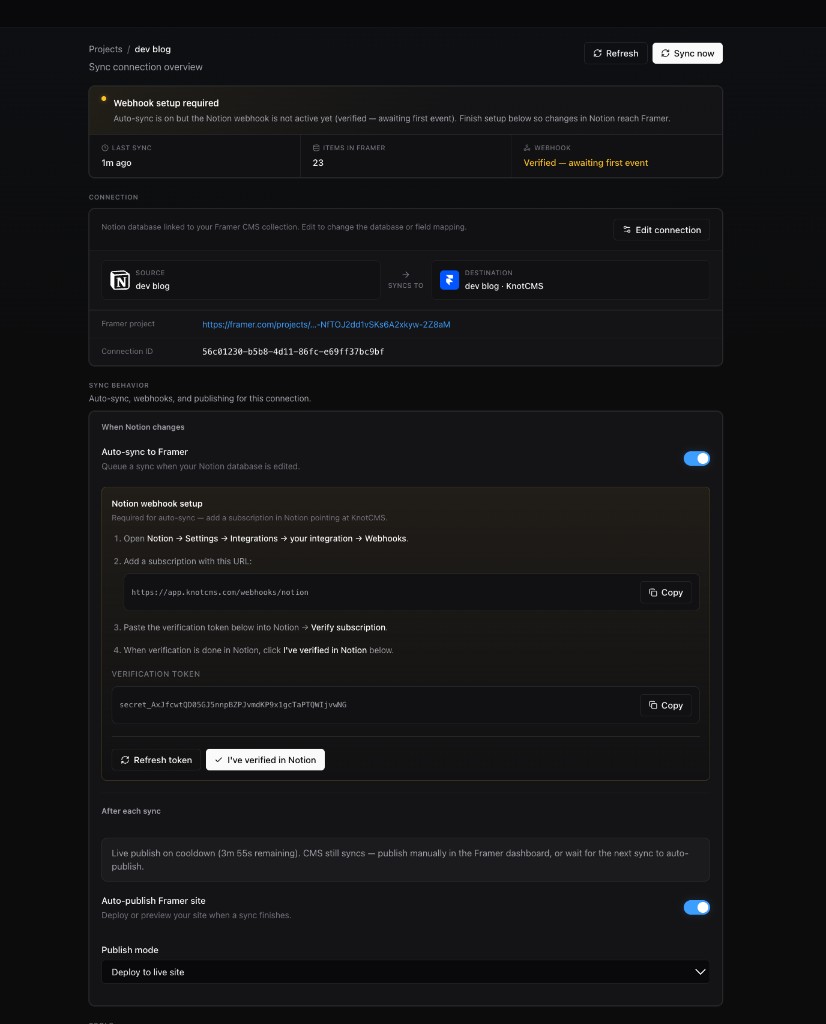
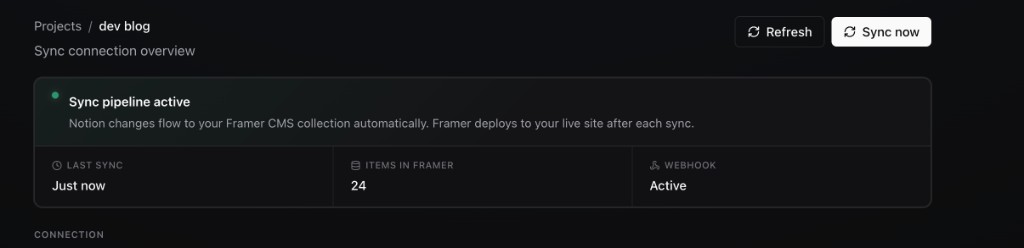
Section titled “6. Confirm your first sync”After Create & sync finishes, KnotCMS opens your new project page. Confirm the first sync ran:
- Last sync shows a recent time (not empty)
- Items in Framer matches your Notion row count
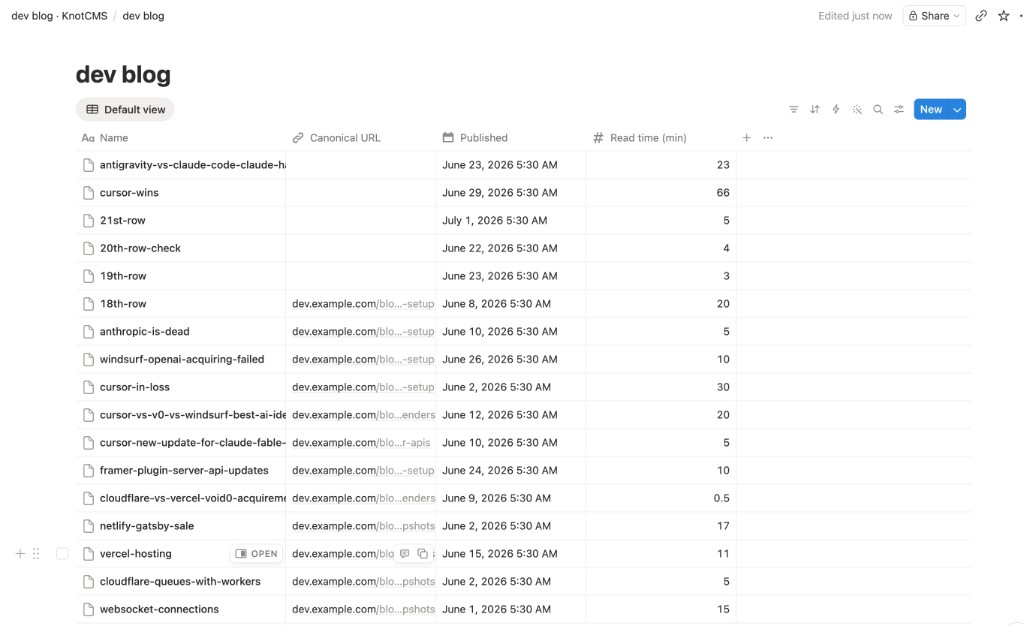
- Open Framer CMS and verify rows appeared in your collection
On the Basic plan, the status banner shows Manual sync only — use Sync now for later updates.
If you turned on Auto-sync during setup (paid), you may see Webhook setup required even though the sync succeeded — that is normal. Finish step 7 for automatic updates; the metrics below still confirm your first sync worked.

7. Verify Notion webhook (if auto-sync is on)
Section titled “7. Verify Notion webhook (if auto-sync is on)”Skip this step on Basic — manual sync does not need a webhook.
If you enabled Auto-sync on Notion changes during setup (paid plans), your first sync still succeeded — but the project page shows Webhook setup required until verification is done.
Quick checklist
Section titled “Quick checklist”| Step | Where | Action |
|---|---|---|
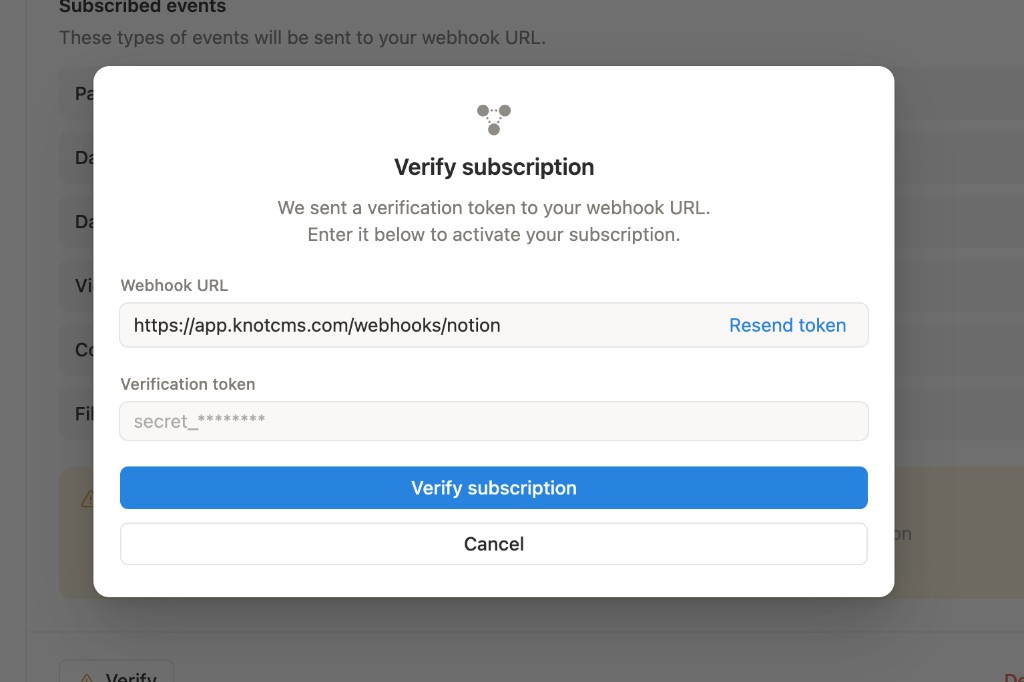
| 1 | KnotCMS | Copy webhook URL from Notion webhook setup |
| 2 | Notion | Integration → Webhooks → + Create a subscription → paste URL |
| 3 | Notion | Click Verify on the new subscription |
| 4 | KnotCMS | Copy the Verification token (Refresh token first if empty) |
| 5 | Notion | Paste token in Verify subscription → Verify subscription |
| 6 | KnotCMS | Click I’ve verified in Notion |
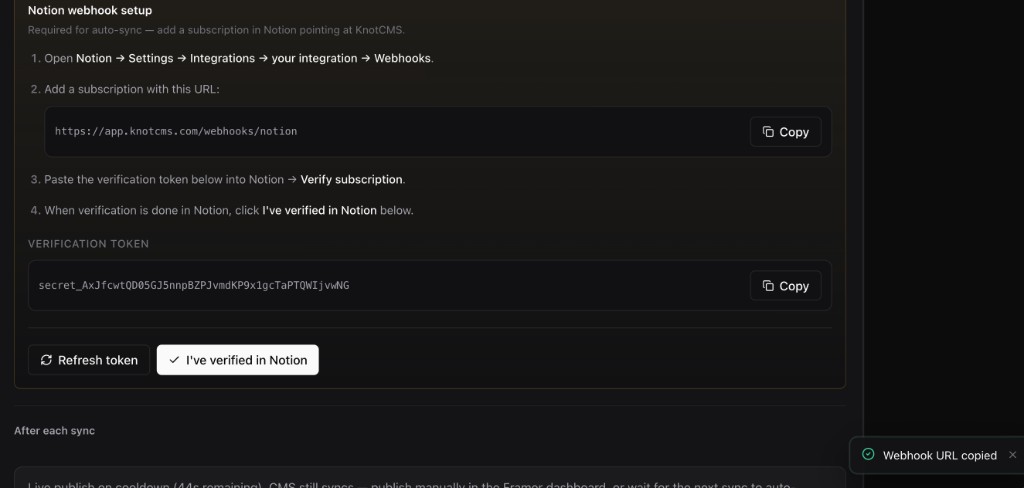
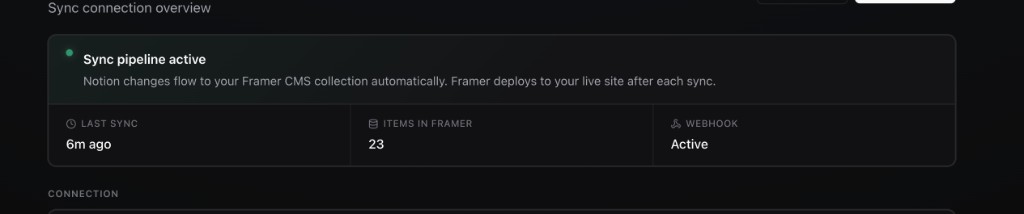
When done, KnotCMS shows Sync pipeline active and Webhook: Active.
Test it
Section titled “Test it”Add a row in Notion, wait ~10 seconds, then refresh your KnotCMS project page — Last sync should show Just now without clicking Sync now.

Next steps
Section titled “Next steps”- Manual sync (Basic plan)
- Webhooks & auto-sync (paid)
- Understand plans and project slots
- Field mapping in depth